TABLE OF CONTENTS
Written by Hillary Bennetts
September 20, 2022
22 Homemade Stage One Baby Food Purees

When it comes to introducing solids, purees are often seen as the go-to. Purees can offer some serious nutritional benefits that differ from other feeding approaches - you can pack a LOT of goodies into a puree!
Plus, purees are pretty simple to make at home. When you make purees at home, you can control the texture and consistency. This allows you to tailor the puree to your baby's preferences and readiness. You can start with a very thin consistency so that it is easy for your baby to swallow and then work your way up to a chunkier puree for an added sensory experience once your baby is accustomed to swallowing and eating from a spoon.
Finally, purees provide an easy way to add variety to a baby's diet, as they can be mixed and matched with different meats, veggies, fats, and other boosters like breast milk, bone broth, herbs, and gentle spices.
Know that we aren't exclusively team puree. Serving foods “baby-led weaning” style also has its benefits, and we think a combination of approaches is great for a number of reasons.
In this blog post, we'll provide an overview of when and how to start solids, what tools you'll need, and some tips for storing and serving. We also share 22 ideas for homemade stage 1 baby food purees.
When Can Your Babies Start Eating Solid Foods? Learn The Signs
Starting to introduce foods can be really exciting for some parents, so there can be a tendency to try and do it a little too early. There is no reason to rush! There are no risks in waiting too long to start solids; however, there are several risks associated with starting too early, so when in doubt, wait!
How do you know when it’s time? While there is no strict timeline, there are signs that a baby may be ready to begin exploring new flavors and textures:
-
Can sit upright well without support
-
Has lost the tongue-thrust reflex (doesn’t automatically push solids out of the mouth with the tongue)
-
Has good head control (does not bob or nod when unsupported)
-
Is willing and able to chew (even if he or she does not yet have teeth)
-
Is developing a pincer grasp (picks up food or other objects between thumb and forefinger)
-
Is interested in food and is eager to participate in mealtime (may watch you closely as you eat, lean into food, or try to grab food off of your plate)
Many babies start to show these signs around six 6 months of age, but every baby is different.
Baby Food Stages: What is the Difference Between Them?
The baby food stages listed on baby food can be very confusing for parents and are not always used in a consistent way by the baby food industry. The idea behind labeling a food with a baby food stage is to help guide parents along a journey of introducing different foods and textures as baby progresses from simple ingredients and thinner smooth purees to multiple ingredients and thicker purees.
Truthfully, baby food stages can be a good guide, but they certainly aren't gospel when it comes to how you should feed your baby. What's more important is to observe your baby and follow their lead. Parents know best, so if your baby is clearly bored with their runny sweet potato baby food, it's time to ramp up the texture and flavor!
In general, here's how baby food stages are defined:
1. Stage 1 baby foods
Stage 1 baby foods are typically the first baby food stage served around six months and are a watery puree of a single ingredient.
2. Stage 2 baby foods
Stage 2 baby foods are intended for around 6 to 9 months and are a thicker texture that is strained or mashed.
3. Stage 3 baby foods
Stage 3 baby foods are intended for around 10 to 12 months and are a mushy but chunkier texture.
But again, these are not hard and fast rules. Most “stage 3” purees are fine for babies as young as 6 months old, and older babies might still like the “stage 1” purees, so use your own judgment.
Baby Food Allergies: How Can You Tell?
It is important to consider food allergies when introducing solids in a safe way. Allergies to baby food are not always obvious - the signs can be subtle and easily mistaken for something else.
There are a few common symptoms that may indicate a food allergy:
-
Rash or hives
-
Vomiting or diarrhea
-
Wheezing or difficulty breathing
-
Swelling of the face, lips, or tongue
It can be scary to experience allergic reactions, so always seek medical attention if you notice any of these signs after feeding your baby. Allergic reactions might present right after a baby eats a new food or up to five days later.
It might seem counterintuitive, but research shows that early allergen introduction is key to helping to prevent food allergies1. Babies don't need much of a food to trigger an allergic reaction or to help prevent food allergies. So-called "micro-exposures" of allergenic foods are enough to help prevent developing food allergies; however, it must be done at the right time with the right proportions, and most of the allergen introduction foods are not based on scientific research. Ready Set Food is a brand we trust for this process, but we believe early allergen introduction is really only necessary for babies that are already at a high risk for allergies.
22 Ideas for Homemade Stage 1 Baby Food Purees
Many parents don’t realize that animal products, like meat, fatty fish, eggs, and liver, are ideal first foods for babies. The truth is, animal products are dense in the nutrients babies really need (like iron, zinc, and healthy fats) and are easier to digest than the grain-based baby cereal commonly recommended for babies. Plus, they have a savory flavor profile. Fun fact: Our ancestors would pre-chew meat for their babies, called “pre-mastication”, as a way to serve pureed meats to baby. Since we now have blenders, that isn't necessary. Of course, go for it if you want!
After meat, veggies are the next best baby food to introduce to your child. Veggies help introduce more savory flavors and nutrients, while fruits like apples and bananas can add a touch of natural sweetness and essential vitamins. Veggies are great steamed, roasted, or sauteed and combined with some healthy fats like grass-fed ghee, whipped bone marrow, olive oil, avocado oil, or coconut oil.
Some fresh fruit is okay, but it can be high in sugar, and offering too much may lead to sweeter taste preferences and picky eating. We do not recommend grains, rice cereal, or baby cereal.
So here we go, 22 ideas for stage 1 baby purees:
1. Meats: grass-fed beef, free-range turkey and chicken, beef liver, chicken liver
Blend cooked meats (the fattier the better) with a little breast milk or formula, bone broth, or water,
2. Bone broth
Okay, so while it isn’t really a puree, bone broth is great for gut health and immunity, and can be served in a bottle or cup. You can even use it to thin out other purees to your preferred consistency. Want to try it yourself? Learn how to make chicken bone broth and see why it’s such a nourishing addition to your child’s diet.
3. Egg and Egg Yolk
Just cook it softly (can use grass-fed ghee or bone marrow) and then mash it up!
4. Sweet potato
Just steam, saute, or roast sweet potatoes and then mash it up!
5. Avocado
All you need is a ripe avocado and then mash it up - as smooth or chunky as you'd like.
6. Peas
Just cook and blend them. They make a great thickener when mixed with other meats and veggies.
7. Carrot
Just steam, saute, or roast carrots and then mash them up! Find more ideas for carrot baby food here!
8. Butternut squash
Just steam, saute, or roast butternut squash and then mash it up!
9. Broccoli
Just steam, saute, or roast broccoli and then blend it up!
10. Cauliflower
Just steam, saute, or roast cauliflower and then blend it up!
11. Zucchini
Just steam, saute, or roast zucchini and then blend it up!
12. Asparagus
Just steam, saute, or roast asparagus and then blend it up!
13. Bell pepper
Just steam, saute, or roast bell pepper and then blend it up!
14. Pumpkin
You can buy pumpkin already pureed, or make your own, similar to butternut squash
15. Green beans
Just steam, saute, or roast bell pepper and then blend it up!
16. Spinach or kale
Just steam or saute spinach or kale and then blend it up!
17. Mango
Mango is brimming with vitamin C and beta-carotene, which are great for the baby’s immune system and eye health. Just blend it up, and once avocado is introduced, consider mixing in a little avocado for healthy fats and a rounder flavour.
18. Peach
Peach brings gentle sweetness and naturally soft texture — perfect for first purees. Blend it up on its own, or blend with a bit of avocado when introduced, so the baby experiences mild sweetness plus healthy fat.
19. Blueberry
Blueberries are rich in antioxidants and offer a fun pop of colour. Just blend them up, and later mix in avocado for a creamy twist and to temper the sweetness.
20. Strawberry
Strawberries provide vitamin C and fibre, with a slightly tangy edge. Blend them up on their own for the first try; when the baby is ready, combine with avocado to introduce healthy fats and mellow the sweetness.
21. Pear
Pear has a naturally gentle flavour and soft texture, especially helpful when the baby is a bit constipated. Blend it up alone, or blend with avocado once introduced, so it’s not purely sweet.
22. Plums & Prunes
Plums and prunes are great to support a baby’s digestion when constipation is a concern. Blend them up, and once avocado is safely introduced, pair it with a creamy avocado combo to balance sweetness and add healthy fat.
Bon Appetit!
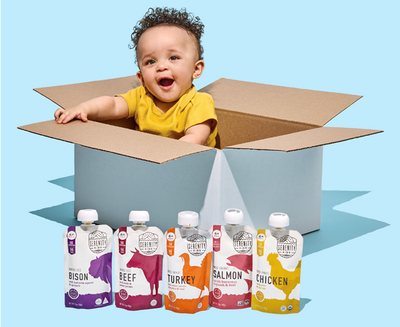
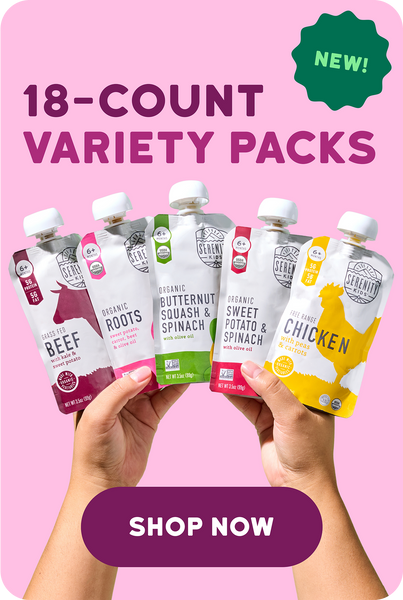
There are a variety of approaches you can take, and decisions around what and how to feed can feel overwhelming. But ultimately, introducing solids should be a fun and exciting journey for you and your little one! Try a baby food variety pack with multiple flavors, textures, and methods of eating to see what your baby enjoys. And remember, preferences might change daily, so go with the flow and follow their lead!
Source:
-
National Center for Biotechnology Information (NCBI). Early Introduction of Allergenic Foods and the Prevention of Food Allergy. https://www.ncbi.nlm.nih.gov/pmc/articles/PMC8308770/
You Might Also Like
· 1 min read · Recipes
· 7 min read · Education
